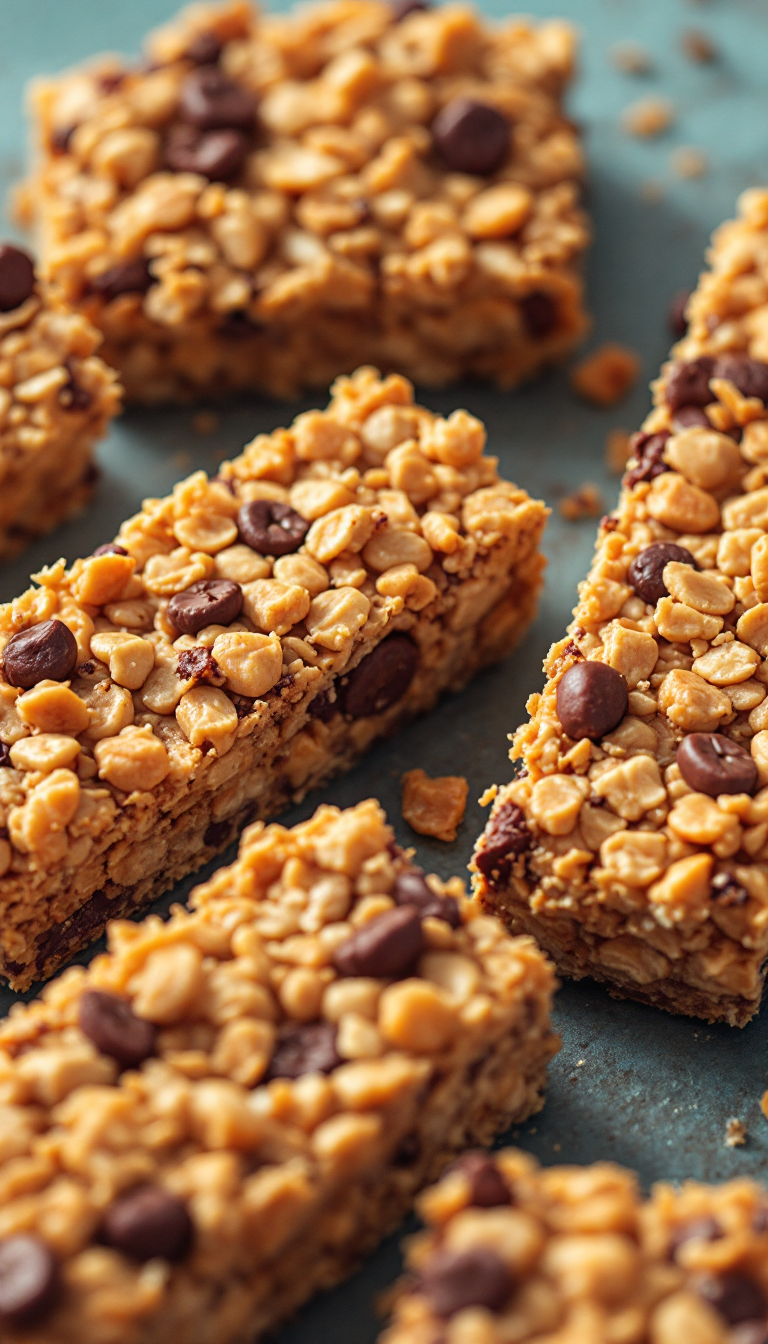
Alright, so these granola bars—let me tell you, they’re like a warm hug in snack form. Imagine the chewy embrace of peanut butter with just the right hint of sweetness, kind of like that one cozy sweater you can’t stop wearing, even when it’s not really sweater weather. You have to taste them to believe how something so simple can be so satisfying, like finding a $20 bill in your pocket from last fall.
Steps
- Prepare a square baking pan by lining it with parchment paper and set it aside for later use.
- In a medium saucepan, mix together the peanut butter, honey, and coconut oil. Heat over medium heat, stirring occasionally, until the mixture begins to simmer. Let it simmer for an additional minute, stirring frequently to prevent burning.
- Remove the saucepan from heat and mix in the vanilla extract and sea salt until well combined. Add the oats and almonds, stirring until everything is fully mixed. If you prefer the chocolate chips to remain intact, chill the mixture in the refrigerator for about 15 minutes before adding them.
- Transfer the granola mixture into the prepared baking pan, pressing it down firmly and evenly to form a flat layer. If desired, sprinkle additional chocolate chips on top. Cover the pan and refrigerate for about an hour until the bars are chilled.
- Once chilled, use the parchment paper to lift the granola slab out of the pan and onto a cutting board. Slice the slab into bars of your preferred size and shape. Serve immediately or store them in an airtight container for up to 5 days, or freeze for up to 3 months.
Ingredients
- 3/4 cup natural peanut butter
- 1/2 cup honey
- 2 tablespoons coconut oil
- 1 teaspoon vanilla extract
- 1/2 teaspoon sea salt
- 2 1/4 cups old-fashioned oats
- 1 cup slivered or chopped almonds
- Optional: 1/2 cup mini semisweet chocolate chips (plus extras for sprinkling on top)
FAQ
- Can I make these granola bars nut-free?
- Absolutely! You can swap out the almonds for seeds like pepitas or sunflower seeds, and use a seed butter, such as sunbutter, instead of peanut butter. Alternatively, you could try adding puffed rice instead of nuts for a nut-free version.
- How can I add more flavors to the granola bars?
- You can incorporate a variety of flavors by adding spices like cinnamon or even a pinch of cayenne for a spicy twist. Additionally, you can mix in dried fruits such as raisins, cranberries, or apricots, or even shredded coconut for extra texture and taste.
- Are these granola bars gluten-free?
- Yes, this recipe is naturally gluten-free as long as you use certified gluten-free oats. Always double-check the labels to ensure all ingredients meet gluten-free standards.
- How can I store these granola bars?
- These bars can be stored in an airtight container at room temperature for up to five days. If you want them to last longer, you can freeze them for up to three months. Just be sure to separate layers with parchment paper to prevent sticking.
- What can I do if I don’t have chocolate chips on hand?
- If you’re out of chocolate chips but still want that chocolate flavor, you can mix 2-3 tablespoons of cocoa powder into the oats. This will impart a chocolatey taste without the need for chocolate chips.
Tips
- Ensure Proper Binding: Heating the peanut butter, honey, and coconut oil together until they simmer is crucial for helping the bars stick together. Be sure to simmer for at least a minute and stir frequently to avoid burning.
- Chill Before Adding Chocolate Chips: If you want the chocolate chips to maintain their shape, let the granola mixture cool in the fridge for about 15 minutes before stirring in the chips. This step prevents them from melting too much.
- Firmly Pack the Granola: Use the bottom of a measuring cup to press the granola mixture firmly and evenly into the baking pan. This helps ensure the bars hold their shape once cut.
- Experiment with Add-ins: Feel free to customize your granola bars by adding ingredients like dried fruit, chia seeds, or spices. For a nut-free version, consider using seeds and seed butter as substitutes.
Equipment
- Square baking pan (8×8-inch or 9×9-inch)
- Parchment paper
- Medium saucepan
- Measuring cups