The moment you bite into this Oreo Cookies and Cream Cheesecake, it feels like discovering a hidden treasure. Imagine a dessert so indulgent, it’s like a hug from your sweetest childhood memories. Just last week, while scrolling through endless TikTok baking hacks, I stumbled upon a cheesecake that promised to be the epitome of creamy delight—this one, with its layers of crushed Oreos and velvety filling, might just be the one dessert to rule them all.
Steps
- Preheat the oven to 350°F and line 12 standard baking cups with paper liners.
- Place an Oreo cookie at the bottom of each liner to serve as the crust. Chop up four additional Oreos and set them aside for later use.
- In a large bowl, combine the cream cheese and sugar, beating with an electric mixer on medium speed until smooth. Incorporate the sour cream, vanilla extract, and eggs, mixing until the batter is smooth and well-combined. Gently fold in the chopped Oreos by hand.
- Evenly distribute the batter into the Oreo-lined baking cups, using a scoop for convenience. Bake for 15 to 17 minutes, or until the edges are firm and the centers have a slight jiggle.
- Allow the cheesecakes to cool on a wire rack for 30 minutes before covering them lightly with foil and refrigerating for 3 to 4 hours until fully chilled.
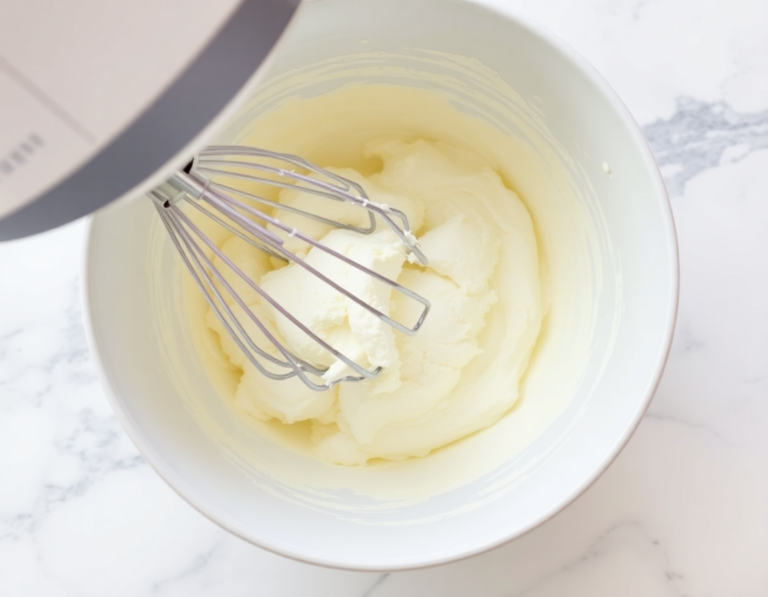
- For optional whipped cream, beat heavy cream and powdered sugar in a chilled bowl with an electric mixer on medium-high speed until stiff peaks form.
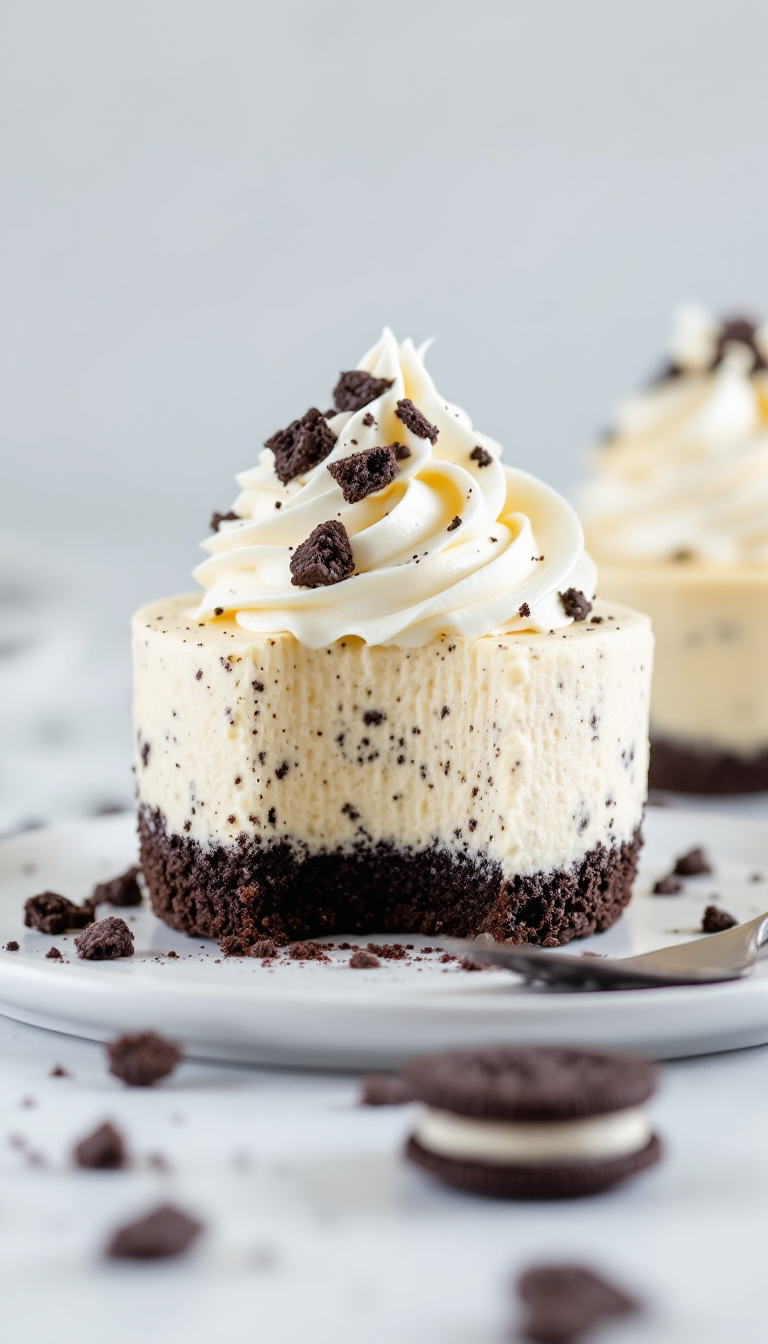
- Frost the chilled cheesecakes with whipped cream using a piping tip or knife, and optionally top each with an extra Oreo for decoration.
- Serve the cheesecakes immediately and enjoy your delightful treat!
Ingredients
- 16 Oreo cookies (plus 12 additional for optional topping)
- 12 ounces cream cheese, softened to room temperature
- 1/2 cup granulated sugar
- 1/3 cup sour cream or plain Greek yogurt, at room temperature
- 1 teaspoon vanilla extract
- 2 large eggs, at room temperature
- 1 cup heavy cream
- 1 tablespoon powdered sugar
FAQ
- Can I use a different type of Oreo for the crust?
- Yes, you can experiment with different Oreo flavors. Just ensure the cookie-to-cream ratio is similar to the classic Oreos for the best results.
- What can I substitute for sour cream in the recipe?
- You can use plain Greek yogurt in place of sour cream if you prefer, as it adds a similar tangy flavor to the cheesecake.
- How do I know when the mini cheesecakes are done baking?
- The cheesecakes are ready when the edges are set and the centers have a slight jiggle, typically after 15-17 minutes in the oven. They will firm up more as they cool and chill.
- Can I make these cheesecakes ahead of time?
- Yes, these mini cheesecakes are perfect for making ahead. Just ensure they are chilled properly and add the whipped cream topping right before serving to prevent it from melting.
- How can I customize the topping for these cheesecakes?
- You can use different toppings such as crushed cookies, various frosting types, or sprinkle with chocolate drizzles, nuts, or sprinkles for added flair.
Tips
- Room Temperature Ingredients: Ensure all refrigerated ingredients like cream cheese, sour cream, and eggs are at room temperature before mixing. This helps achieve a smooth batter and ensures even baking.
- Avoid Over-Mixing: Mix the batter ingredients just until smooth and combined. Over-mixing can incorporate too much air into the batter, affecting the texture of the cheesecakes.
- Check for Doneness by Jiggle: Instead of using a toothpick, check the cheesecakes for doneness by ensuring the edges are set and the centers have a slight jiggle. They will continue to firm up as they cool.
- Add Whipped Cream Before Serving: For the best presentation, add whipped cream just before serving to prevent it from softening or melting. Homemade whipped cream can be made ahead and stored for up to 24 hours.
Equipment
- Electric Mixer – Useful for beating the cream cheese and sugar mixture to a smooth consistency.
- Standard Baking Pan with twelve cups – Necessary for holding the baking cups.
- Paper Liners – To line the baking cups.
- Wire Rack – Needed for cooling the cheesecakes after baking.
- Piping Tip (optional) – For frosting the cheesecakes with whipped cream, if you choose to make homemade whipped cream.
- Mixing Bowl – Large enough to mix the batter ingredients.
- Scoop – To evenly distribute the batter among the baking cups.